A roof inspection in the fall is one of those jobs nobody puts on the calendar. Then January arrives. You hear a slow drip in the hallway, or you spot a brown ring spreading across the bedroom ceiling. A small problem you could have fixed in October is now wet insulation and ruined drywall.
This checklist is here to help you skip that moment. It covers what you can safely check yourself. It also shows what is better left to a professional, and which problems cannot wait until spring. You do not need to be handy. You just need an hour, a pair of binoculars, and a calm afternoon.
Why a Fall Roof Inspection Matters More Than You Think
Your roof works hard all summer. Then winter asks even more of it. Snow sits for weeks, and temperatures swing above and below freezing again and again. Every tiny gap gets tested.
Here is what makes water so sneaky. It slips into a crack no wider than a pencil line, freezes, and expands. The crack opens a little more. At the next thaw, more water gets in, and the cycle repeats all winter long.
A fall roof inspection catches those gaps while they are still small. A cracked pipe boot is a quick fix on a dry day. By February, that same boot can mean soaked insulation and stained ceilings. Most people wish they had looked sooner.
When to Schedule Your Roof Inspection Before Winter
In the Twin Cities, the first measurable snowfall arrives around November 5 on average, based on a 30-year record. The median date for the first full inch is November 15. Roofers get busy fast once cold weather settles in. Aim to finish your roof inspection by early November, and sooner if you can.
Weather matters too. Wet shingles hide problems, and a slick surface is dangerous. Choose a dry, clear day and go between late morning and mid-afternoon, when the light is best. If you are reading this in late October, you still have a good window.
What You Need Before You Start
You do not need special gear for a DIY roof inspection from the ground. A few simple tools make the job easier and safer. Here is what to grab:
- Binoculars or a phone with a good zoom lens.
- A flashlight or headlamp for the attic.
- A notepad or your phone for notes and dated photos.
- A sturdy ladder, only for gutter checks, with someone holding it.
Please stay off the roof itself. Walking on shingles can scuff off protective granules and crack brittle shingles in cold weather. A fall is never worth the few dollars you might save. Everything on this list can be checked from the ground, a ladder at the gutter line, or inside the attic.
The Fall Roof Inspection Checklist
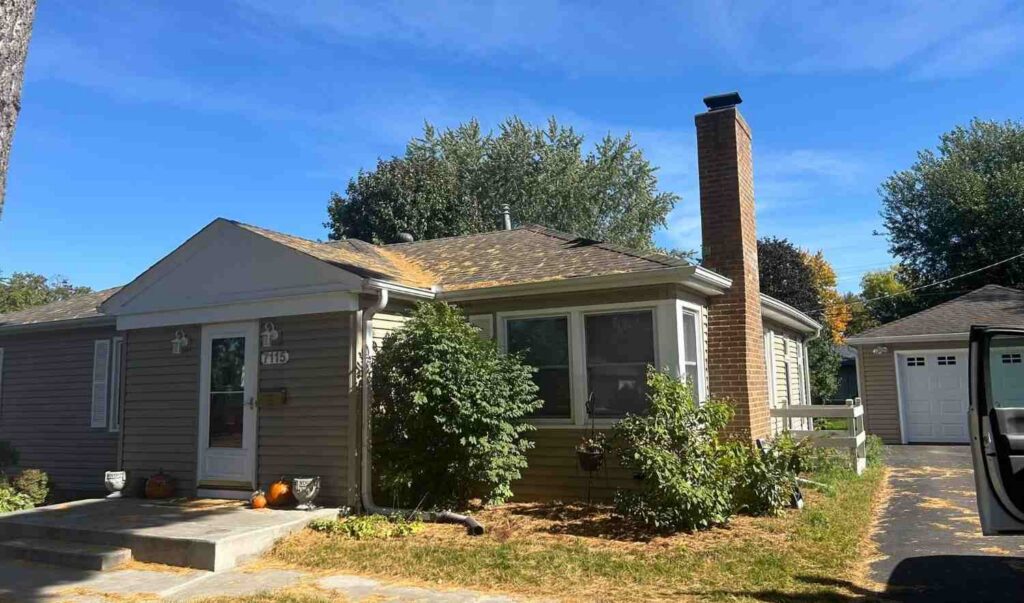
Work through these ten areas in order. Take a photo of anything that looks off, and note where it is. Do not worry if you are unsure about something. Write it down and ask a pro later.
1. Shingles
Start with the surface everyone sees. Stand back far enough to see each slope, and scan slowly with your binoculars. You are looking for anything that doesn’t match the shingles around it. One odd shingle can mean wind damage, while a whole patch often means the roof is wearing out.
- Missing shingles or bare patches.
- Cracked, curled, or cupped edges.
- Dark, bald spots where granules have worn away.
- Tabs that have lifted and no longer lie flat.
2. Flashing
Flashing is the thin metal that seals the joints where your roof meets something else. Think chimneys, side walls, dormers, and skylights. These joints are some of the most common places for leaks to start. Look for rust, gaps, lifted edges, or thick globs of old roofing cement. That cement is usually a quick fix someone made years ago, and it rarely lasts.
3. Pipe Boots and Roof Vents
Plumbing pipes poke through your roof, and each one wears a rubber collar called a boot. Sun and cold crack that rubber over time. A split boot lets water run straight down the pipe and into your attic. Check every boot and roof vent for cracks, gaps, or missing caps.
4. Chimney
Chimneys take a beating from freeze and thaw. Look at the mortar between the bricks for crumbling or missing pieces. Check the crown, the concrete cap on top, for cracks. A damaged crown lets water soak into the brick, and that water expands when it freezes.
5. Gutters and Downspouts
Gutters are your roof’s drainage system, and fall is when they work the hardest. Leaves clog them fast. Standing water then freezes, gets heavy, and can pull the gutters away from the house. Clear the debris, look for sagging sections, and make sure downspouts empty well away from your foundation.
Check for granules too. They look like coarse black sand. A little is normal on a newer roof. Heaps of it on an older roof mean the shingles are wearing thin.
6. Soffit, Fascia, and Drip Edge
These are the roof edge parts people forget. The soffit is the underside of the overhang. The fascia is the board behind the gutters. The drip edge is the metal strip that guides water into them.
Look for peeling paint, soft spots, stains, or small holes where animals may have gotten in. Rot here often means water has been getting in for a while. Catching it now is far easier than replacing a section later.
7. Skylights
Skylights are lovely until they leak. Check the seal around the frame for cracks or gaps. Then look at the ceiling beneath for stains or bubbling paint. If a skylight looks foggy between the panes, that is a glass seal issue, not a roof leak.
8. Moss, Algae, and Overhanging Branches
Dark streaks are usually algae, and they are mostly cosmetic at first. Moss is different. Its roots work under shingle edges and lift them, which lets water in. Trim any branches hanging over the roof too, since snow, ice, and wind can drag them across the shingles.
9. The Attic
Now grab the flashlight and head up to the attic. Some of the best clues are hiding there. Look at the underside of the roof deck for dark stains, damp patches, or daylight showing through. Check that the insulation is dry and evenly spread, with no flattened or wet spots.
- Soffit vents that are blocked by insulation.
- Bathroom and kitchen fans that vent into the attic instead of outdoors.
- A musty smell, or frost on nails or the deck once cold weather arrives.
Ventilation matters more than most people expect. A common rule of thumb is one square foot of vent opening for every 150 square feet of attic floor. The right number depends on the vent type, so a roofer can confirm what your attic needs.
10. Ceilings and Walls Inside
Finish inside the living space. Look at top-floor ceilings and walls near chimneys for yellow or brown stains, peeling paint, or soft bubbles. A stain with a ring around it often means a leak that has come and gone more than once. Take a dated photo of anything you find, so you can see whether it grows. Keep those photos in one phone folder, year after year.
Ice Dams: The Winter Problem a Fall Inspection Can Prevent
Ice dams are the winter problem a fall inspection can help you get ahead of. Heat leaks from your home into the attic and warms the roof deck. Snow on top melts, runs to the cold edge of the roof, and freezes again. The ice builds into a ridge that traps water behind it. That water can then creep up under your shingles.
Ice dams can form with as little as two inches of snow. The root cause is almost always in the attic, not on the roof. Warm air slipping through gaps around light fixtures, hatches, and vent pipes is the usual culprit. Sealing those leaks, then adding insulation and balanced ventilation, is what actually fixes it.
Minnesota energy code calls for roughly R-49 of attic insulation, but many older homes have far less. Building code also calls for a waterproof membrane along the eaves on new roofs. It helps protect against leaks, though it does not stop dams from forming. This fall, look for stains near the eaves. Also think back to any winter with very long icicles.
Fix Now or Watch? How to Sort What You Found
Not every finding is an emergency. Use this table to sort what you saw. When in doubt, take a photo and ask a roofer.
| What You Found | What to Do |
|---|---|
| Missing, cracked, or lifted shingles | Repair before winter |
| Cracked pipe boot or loose flashing | Repair before winter |
| Active leak or fresh ceiling stain | Call a roofer right away |
| Clogged or sagging gutters | Clear or fix before the first freeze |
| Wet insulation or stains in the attic | Have it checked soon, with the cause found |
| A sagging roofline | Call a roofer right away |
| Light granule loss or mild algae | Watch it, and recheck in spring |
| Several problems on an older roof | Ask about long-term options |
A single damaged shingle is routine. Problems in several places at once tell a different story. If your list keeps growing, our roof repair team can help you sort what needs attention now. If water is coming in right now, call our emergency roof repair team instead.
What a Professional Roof Inspection Adds
A ground check has limits. A professional roof inspection goes further, because a trained roofer can get onto the roof safely. They see small details you cannot spot from the yard.
- Cracked sealant around vents, chimneys, and skylights.
- Nails that have backed out and lifted a shingle.
- Worn valleys, where water from two slopes meets.
- Soft spots in the decking you can feel underfoot.
- Hail bruises that look like nothing from below.
At Gopher Roofing & Restoration, we offer a free roof inspection. We photograph what we find and explain it in plain language. You see exactly what we see, and we tell you what needs attention now and what can wait.
Already seeing a stain? Water often travels far from where it enters, so finding the true source matters. That is exactly how we approach roof leak repair. Did a hailstorm come through this year? Our storm and hail damage team can check for damage that is easy to miss.
How Often Should You Have Your Roof Checked?
A good rule is one roof inspection every year, ideally in the fall, with a quick look in spring. Add another after any major storm. Even a newer roof deserves a yearly check, because installation mistakes and storm damage do not wait for age.
Age changes how closely you should watch. In cold climates like ours, three-tab shingles often show their age between 12 and 18 years. Architectural shingles often last 20 to 28 years. Once your roof reaches that range, treat each inspection as a planning conversation, not just a check-up. If yours is near the end, ask about roof replacement early, before a leak forces your hand.
FAQs: Fall Roof Inspection
A typical single-family home takes about an hour or two. Steep roofs, complex layouts, or a full attic check can add time. Ask your roofer to walk you through the findings afterward.
Yes, for the ground-level and attic parts. Use binoculars, stay off the roof, and take photos of anything unusual. A professional roof inspection is the safer choice for close-up checks on the roof surface.
Not entirely. Attic and indoor checks work any time of year. Snow and ice can hide damage on the roof, though, and some repairs wait for a dry day. That is why earlier is always easier.
Yes, though it takes less time. Installation mistakes and storm damage can happen at any age. A quick yearly look catches small issues while they are still easy to fix.
Yes, ideally after most of the leaves have fallen. Clogged gutters hold water that freezes and adds weight. That can pull them loose and push ice back toward your roof edge.
Look for thick ice along the eaves and very long icicles. Inside, watch for stains on ceilings near exterior walls. Dark marks on the underside of the roof deck in the attic are another sign.
Often, yes, but conditions matter. Shingles seal best in milder temperatures, and wet or icy surfaces are unsafe to work on. Small fixes made this fall are easier than rushed ones in January.
At Gopher Roofing & Restoration, a roof inspection is free. You get photos and a plain-language explanation of what we find. You decide what happens next.
Get a Roof Inspection Before the First Snow
If you live in Minneapolis or anywhere in the areas we serve, we would be glad to take a look. We are a family-owned crew, and we know what winter does to a roof. Our Minnesota contractor license number is BC794536.
A quiet January starts with a little attention in October. Call us at 612-331-7663, or book your free roof inspection online. We will help you head into winter knowing exactly where your roof stands.